Share
Pin
Tweet
Send
Share
Send
Star motifs from vintage shreds will appeal to your baby.


YOU WILL NEED: • 1 m of pre-washed white cotton fabric 110 cm wide; • 1.20 m of pre-washed white cotton fabric in red polka dots 110 cm wide; • different patterned vintage fabrics; • 90 x 90 cm synthetic winterizer at will; • 4 m gear galun red; • pieces of ribbons of different colors, approx. 15 mm; • matching thread for sewing; • tracing paper, pencil, xerox; • cutter, ruler and substrate for cutting.
MAKE A TEMPLATE AND CARRY OUT THE ROMBES
WITH fig. 1 (top) using tracing paper, re-loosen the diamond. Increase the rhombus on a xerox so that the length from one acute angle to another is 34 cm, cut out. Cut 6 rhombs: 3 rhombuses - from different vintage fabrics, 3 more rhombuses - from polka-dot fabric. 0.75 cm wide allowances are already included in the dimensions of the rhombus.
COMPLETE AND CONNECT LAYERS
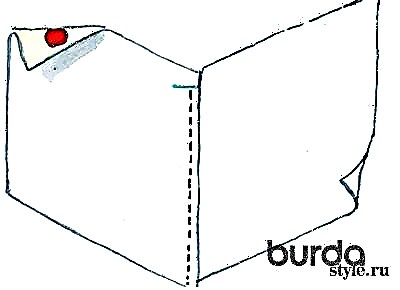
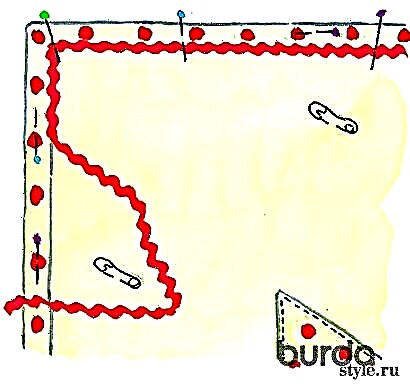
Stack all the diamonds together, as shown infig. 2-4 (up). At the same time, iron all the seams. Iron the allowance for the cuts of the finished star on the seamy side, 0.75 cm wide. Place the star on the white fabric exactly in the middle, flatten and pin it with pins. Under the bottom, put a synthetic winterizer, stitch the star in the edge. Cut the top layer with padding polyester to a size of 86 x 86 cm, while the star should remain in the middle.Pin the top layer of the blanket in the center of the polka dot fabric with the wrong side to the wrong side, cut the protruding sections of polka dot fabric along the contours so that they protrude 2.5 cm from the top layer of the blanket (fig. 5 above) Iron the protruding sections on the top layer of the blanket, laying on the corners along the fold, pin or bite. Pin the galloon precisely over the ironed sections. Stitch together with a straight line exactly in the middle of the galun with a red thread (fig. 6 above).
ANGLES
Cut 16 squares of 7x7 cm in size from vintage fabrics. Stitch 4 squares between each other (fig. 7 above) At the same time, iron the allowances of each seam in one direction. Iron the allowances on the outer cuts of the squares on the wrong side, 0.75 cm wide. Pin the squares to the corners of the blanket at a distance of 1 cm from the toothed galloon (fig. 8 above) and scribble to the edge.
LAST STEP: QUIT
Stitch the blanket on a typewriter or by hand, using arbitrary children's motifs, such as butterflies, flowers, bears, etc. At each end of the star, wash manually a half-length of a piece of tape approx. 10 cm (fig. 9 above).
PHOTOS AND FIGURES: EMMA MITCHELL AND HOLLY JOLLIFFE / LOUPE IMAGES
Material prepared by Julia Dekanova
Share
Pin
Tweet
Send
Share
Send