Share
Pin
Tweet
Send
Share
Send
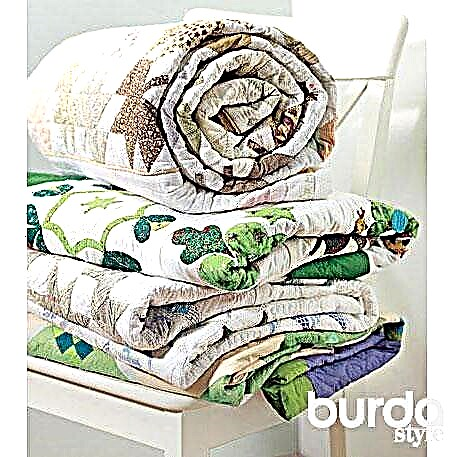
Here you will learn all the secrets of this skill: what fabrics to use, how to cut them, fold patterns, how to connect three layers, how to quilting ...
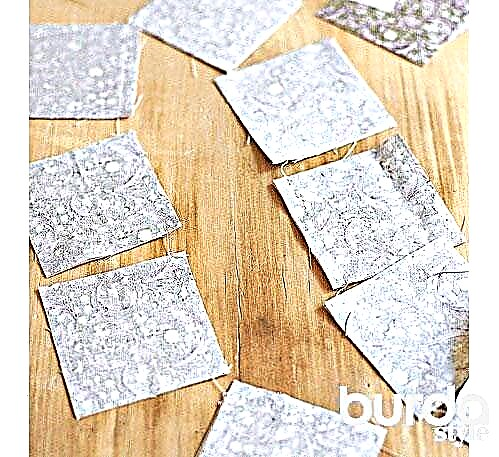
WHICH FABRICS SUIT?It is better if the fabrics are the same in quality. Cotton fabrics are ideal for beginners: items made of them are easy to wash, and most importantly, cut and sew. Choose drawings according to your own imagination. But for starters, it’s better to choose fabrics with a pattern in a single key and combine them with plain fabrics. Before cutting fabrics, it is very important to cut off all the edges from them.
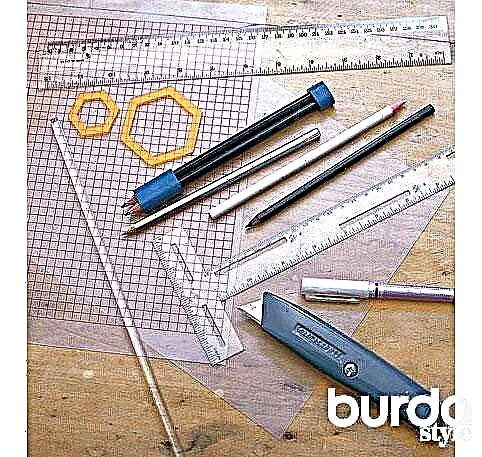
WHAT YOU NEED FOR MARKING AND DISCUSSION
Plastic patterns
Pencils and felt-tip pens
Ruler / Cutter Knife
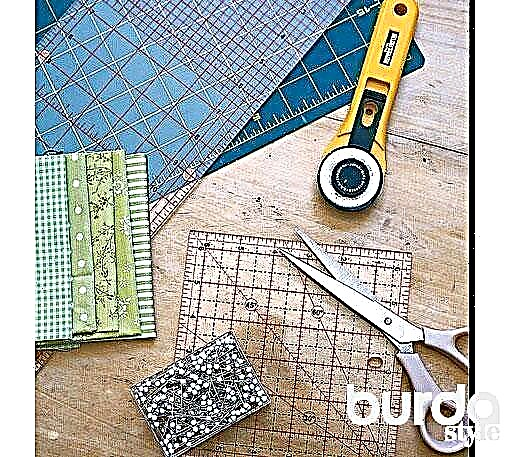
WHAT YOU NEED FOR MEASUREMENT AND CUTTING
Mat for cutting
Round knife-cutter (with a blade in the form of a rotating wheel)
Raster Rulers / Pins / Scissors
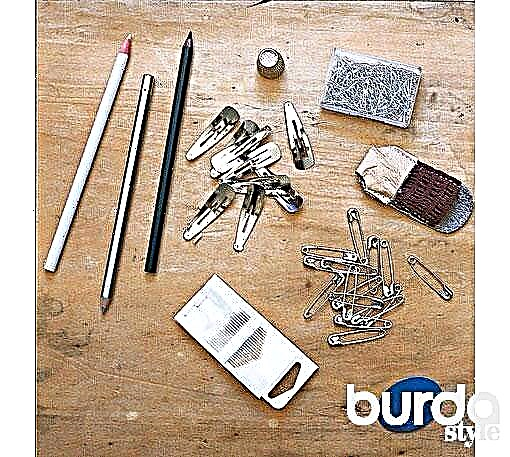
WHAT YOU NEED FOR GRINDING AND EDGING
Thimble
Safety Pins / Safety Pins
Paper clips or clips
Pencils / Sewing Needles
SIMPLE GEOMETRIC PATTERNS can be cut using a standard raster ruler. For more complex shapes, take plastic templates instead of paper templates. They are not only more durable, but also transparent, so through them you can easily see the pattern on the fabric. On sale, sometimes you can also find templates with ready-made layouts for geometric patterns.
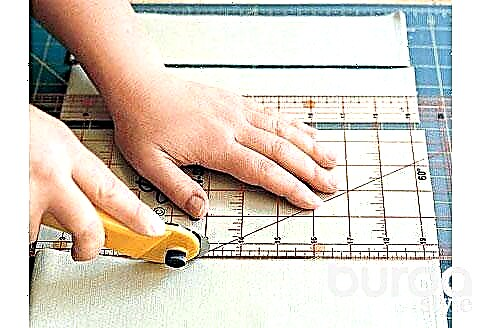
CUT
Fold the ironed fabric twice in the longitudinal direction so that four layers are obtained (folds should run parallel to the edges). Lay the fabric on the cutting mat so that the cuts are on the right. Put the raster ruler at right angles to the fold and trim the fabric sections. Fold the fabric and check for straight sections. In extreme cases, repeat the operation.

Rotate the mat with the fabric 180 °, now the cuts should be on the left. Measure a strip of fabric. Use the vertical scale on the right side of the ruler to measure. Cut 3-4 strips. Turn the mat over again and trim the cuts. To get rectangles or triangles, cut the resulting squares accordingly.
FOLDING PATTERNS
Fold two shreds face to face and grind on one side. Experienced craftswomen grind shreds with one seam, without cutting the threads and without raising the foot of the machine.
Attention: with this method of sewing between the squares, several stitches appear that do not capture the fabric.
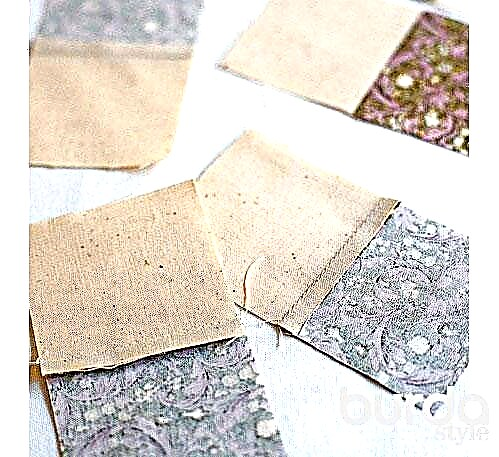
When sewing scraps of fabric, be sure to iron allowances on a darker fabric. To get a square block of shreds, simply stitch together two already-squared square shreds so that the shreds from different fabrics are staggered.
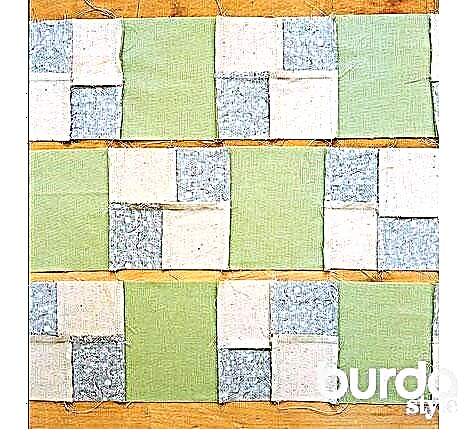
You can get stripes from shreds in the following way: stitch squares of four square color shreds and rectangles or squares from plain fabric in a checkerboard pattern. After this, again, in a checkerboard pattern (with a shift), separate rows of shreds. In the next photo you will see that on the bedspread each inner row consists of plain squares and blocks of four multi-colored rags.
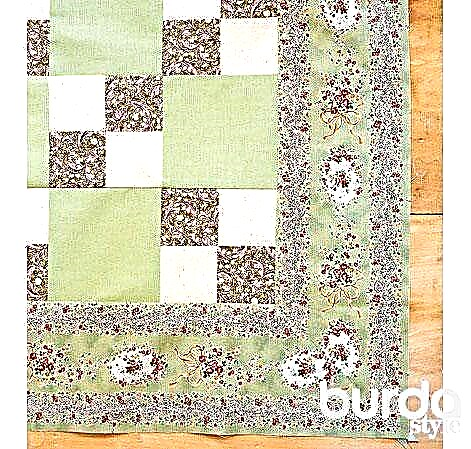
When the central part of the patchwork product is ready, start sewing borders. The perimeter of the central part of the product determines the total length of the border. Usually curbs, stitched to the sides of the central part, grind "corner of the envelope."
The length of the border for each side is considered as follows: the length (or width) of the central part of the product + the double width of the border (for the "corner of the envelope") + allowances for seams. Stitching the border to the side of the central part of the product, finish the seam, not reaching 6 mm to the corner. At the corners, grind the fabric exactly at an angle of 45 °.Cut off excess allowances, iron the remaining allowances on the curb.
Quilting
Quilted products made of shreds consist of three layers: the upper and lower (from shreds, or, as an option, the upper - from shreds, the lower - from plain fabric) and internal (voluminous, which gives the product a special relief when quilting).
Before joining all three layers, carefully iron the top and bottom sides. Lay out the bottom side face down and fix it on the surface with masking tape. Lay out the inner part and the upper side (face up) on the lower one, smooth it out evenly and fix it with safety pins from the center to the periphery at 20 cm intervals.
If you are going to quilting the product manually, then sweep all three layers up and down at intervals of seams of 15 cm, removing pins one by one. Only after that, draw a quilting line on the upper side of the product with a thin pencil.
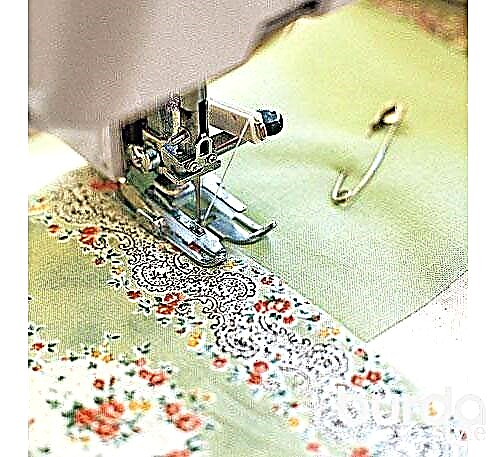
SEWING WITH A SEWING MACHINE
Make sure that the upper and lower sides do not slide relative to each other. To do this, insert the special, raised foot of the machine. Always sew from the center to the periphery, otherwise waves will appear on the product. So that the seam on the product is almost invisible, but a beautiful structure appears, scribble exactly into the seam of sewing shreds. At the end and beginning of the seam, make fasteners: raise the bobbin thread up and make a few stitches of the smallest size. Optimum tack length - 7 mm. After you bind, trim the ends of the threads.
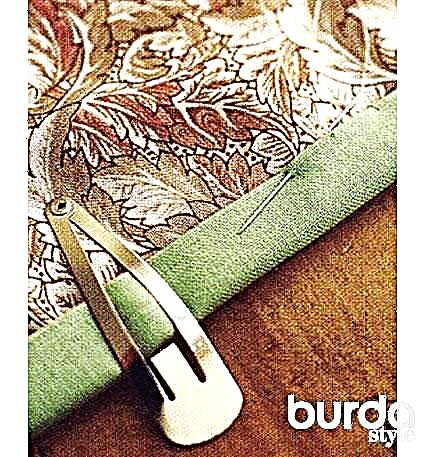
Tip: during quilting, twist the free part of the product into a roll - so it will be more convenient for you to work.
MANUAL BELT
With this method of operation, the product is pulled into the frame (like an embroidery hoop). The ideal option is a handmade frame that can be leaned against the table, as a result you will have free hands.
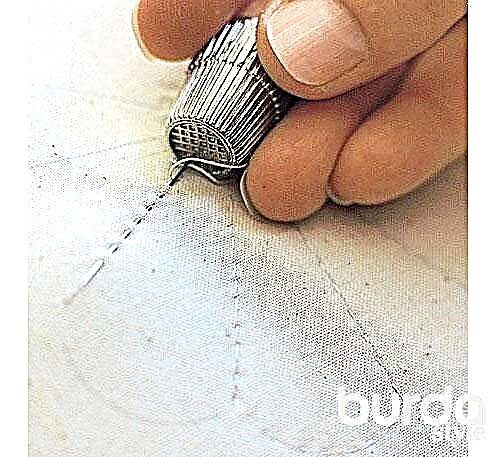
When stitching manually, also sew from the center to the periphery. With a small needle with a thread 50 cm long, at some distance from the starting point, sew stitches through all three layers of the product. In one go, make several even, fine stitches, then gently pull the thread.
Tip: It will be easier to work if you put a thimble on the middle finger of the working hand, and put on a leather cap on the index finger of the other hand, which supports the product from below.
PREPARATION FOR EDGE
First, trim the edging fabric in strips across the shared thread. The width of the edging is approximately 7 cm. The total length of the machined strips is equal to the perimeter of the product + 15 cm for diagonal angles + lapels at the ends.
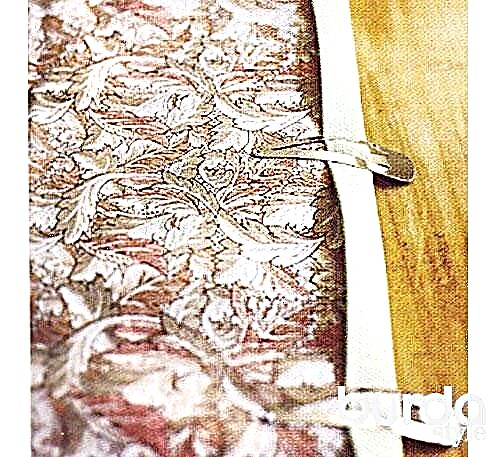
Strip strips at an angle of 45 ° in one long strip. Iron the strip, folding it in half, with the wrong side inward. Now lay the strip in one layer. Align the sections of the inside and bottom of the product along the top of the product. Iron one end inward so that a triangle appears. Starting from this ironed end, pin the strip to the upper side of the product along the entire length of one side with an interval of 10 cm. Slices of the edging lie on the sections of the product. Stitch at a distance of 7 mm from the edge of the edging, grabbing all the layers of the product.
EDGE: STEP BY STEP
Before reaching 7 mm to the corner of the product, interrupt the seam, make a bartack.
Turn the fringing strip outward at an angle of 45 °, then turn the fringing strip down so that the fold is exactly at the level of the already edged edge of the fringing.
Now sew at a distance of 7 mm from the edge of the edging on the next side of the product, grabbing all three layers.
Treat other corners in the same way. When you thus turn over all sides of the product, that is, you will reach the beginning of the edging, cut off the excess allowances of the edging, tuck the end and end the seam.
At the end, wrap the edging on the bottom side of the product, fix it with clamps and sew it by hand with hidden stitches.
Share
Pin
Tweet
Send
Share
Send